It’s absolutely unholy. .NET Standard with a WordPress front end!? Yes, it’s possible. This odd concoction happened when the front-end developer hired claimed he could consume/operate his design around any language, but actually could only produce WordPress websites. My solution was to use a .NET Core API on top of our product database (MSSQL) and then write my own PHP WordPress Plugin that would list products by product line and then another plugin to display the products clicked in that product line. All products are maintained in another .NET Core app that allows for the products to be centralized in one spot while the front end design can be just about anything.
To walk through how I did this, I’ll start with the creation of the .NET Core API.
Creating a Simple .NET Core API
The Sample Database (Free)
For this example, I wanted to use a free database option so anyone can try it. The database I chose contains Classic Car Models (see schema) and is commonly used as an example. To set up the database, I signed up for a free account at Free MySQL Hosting and then followed the link to phpMyAdmin. I made some modifications to the original SQL file I downloaded (changed name of database and changed the image field in ProductLines to a string (for url). In that image field, I added a link to Lorem Picsum so I could see some random images in the front end design. After all the guess work, here’s the steps:
- Sign up for a free account at Free MySQL Hosting
- Download my modified SQL file (with image links filled in)
- Log into Free MySQL hosting and follow the phpMyAdmin link
- Select your database > Import > Import SQL file.
The sample database should now be populated and ready for remote access.
Scaffolding the Models into .Net Core
I used the ASP.NET Core Web API template to create my API app, but this is my first time connecting to MySQL. I needed to scaffold the tables from this sample database into models that I could use with Entity Framework, and so I brought in EntityFrameworkCore (5.0.13) and two more packages listed in the documentation. My final connection string + scaffolding command looks like this:
Scaffold-DbContext "server=sql10.freemysqlhosting.net;user=sql53534897;password=JQAPEFmznir3QD;database=sql53534897" MySql.EntityFrameworkCore -OutputDir Models -f
I initially received a Microsoft.EntityFrameworkCore.Diagnostics.IDiagnosticsLogger error, but after downgrading as advised in the docs, I resolved the issue and all my models scaffolded in nicely. I changed the name of the Context from sql53534897Context to ProductContext and all was lovely.
I added a quick generic repository I use that has caching, configured Swagger and all worked great.
Here’s the Core API on GitHub.
Some More Notes on Setup
There are two TODO’s:
- One in ProductContext, to replace the system variable with own connection string
- In the configuration of Swagger, I like XML comments on each controller with examples of input. When setting this up, a special option must be clicked in the project properties (it has been noted in comments)
Creating the WordPress Plugins
WordPress plugins aren’t as hard to create as it may seem – getting through the tutorials is. There’s one or two I remember, but for the most part… looking at the code example for this, it should be pretty easy to follow the bouncing ball.
To start off, I’ve created two WordPress Plugins:
- Product Line List – This plugin lists product lines and allows the user to click on one to retrieve products within that line.
- Products – This plugin accepts a parameter (line) and lists all products for that line.
The code itself is pretty easy to follow:
Follow the WordPress Plugin on GitHub.
Plugin Notes:
- plugin “hooks” are the “add_” calls that grab your function and hook it into a named WordPress function, ie: init
- crucial plugin parts: header, API call (and url), shortcode definition
- be sure files (both php and css), whether created in Visual Studio Code or other IDE, are encoded in utf-8 WITHOUT BOM, or you will get an error: The plugin generated 3 characters of unexpected output during activation)
- when done, zip entire folder including php file and sub css folder and file into 1 zip. upload as plugin
How The Plugins Work
List
For the product line list:
-
- simply create a page, title it
- drop the shortcode inside: [|catcod_product_lines|]
(remove | for real thing below):
See the full page demo
*Notice each button points to a link specifying a product line. Ex: “/classic-cars”
Selected Item (on click)
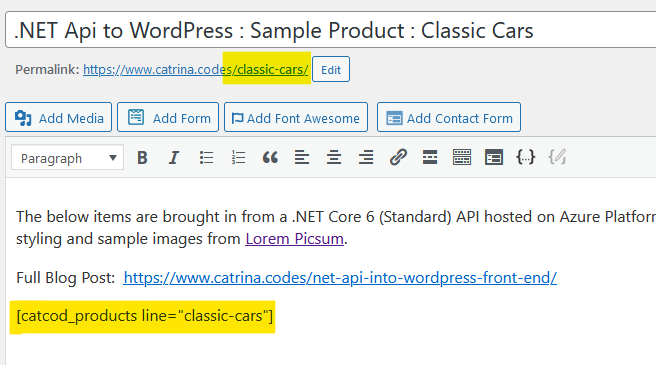
- Create a page, and title it appropriately for its line, ex: “Classic Cars”
- Modify the permalink to match the link for it’s correlating button
Click the “Read More” button to see how this link works
Final Thoughts on this Solution
This wasn’t my ideal approach, but facing time constraints – this ended up being a nice solution for a small site. Looking back, here’s a quick list of what I did gain using this solution:
- Easy to adopt CMS – it’s the most widely known CMS and can easily be passed on for someone to maintain the front-end with little or no training.
- Quick redesign – again, because of its notoriety, it’s relatively easy to hire someone to remake the site and drop in the shortcode where product listing is needed.
- Platform free – can be deployed on IIS or on any LAMP setup
- Centralized product management – I can specify region, brand, markets etc on my API and have a website pull the products needed according to that. This way, when a product is dropped, it is done in one location without having to login to various sites and maintain the adds/drops
This can probably be grown into something much larger, involving logins, secure information, connecting the API to seamlessly integrate into WordPress (and might have been done already). It was an interesting solution and one I’ll have already grown upon – but will have to keep re-evaluating depending on our needs.


